30/09/2014

JavaScript Syntax

JavaScript is ascripting language. A scripting language is a light weight programming language. The sentences in a programming language are called statements.

The principles, how sentences are constructed in a language, are called language syntax.

JavaScript Literals
In a programming language, aliteralis a constant value, like 3.14. Number literalscan be written with or without decimals, and with or without scientific notation (e)
<!DOCTYPE html> <html> <body> <p id="demo"></p> <script> document.getElementById("demo").innerHTML = 123e5; </script> </body> </html>
String literals can be written with double or single quotes
<!DOCTYPE html>
<html>
<body>
<p id="demo"></p>
<script>
document.getElementById("demo").innerHTML = 'John Elwin';
</script>
</body>
</html>
Expression literal sevaluates (computes) to a value:
<!DOCTYPE html>
<html>
<body>
<p id="demo"></p>
<script>
document.getElementById("demo").innerHTML = 5 * 10;
</script>
</body>
</html>
Array literals defines an array:
[40,100,1,5,25,10]
Object literals defines an object:
{firstName:"John",
lastName:"Elwin", age:22,
eyeColor:"blue"}
Function literalsdefines a function: functionmyFunction(a, b) {returna * b;}
JavaScript Writing to The HTML Document

Writing to The HTML Document
For testing purposes, you can use JavaScript to write directly to the HTML document
Example:
<!DOCTYPEhtml> <html> <body> <h1>My First Web Page</h1> <p>My first paragraph.</p> <script> document.write(Date()); </script> </body> </html>
Use document.write for testing only. If you execute it, on a loaded HTML document, all HTML elements will be overwritten.
Example:
<!DOCTYPEhtml> <html> <body> <h1>My First Web Page</h1> <p>My first paragraph.</p> <buttononclick="myFunction()">read it</button> <script> function myFunction() { document.write(Date()); } </script> </body> </html>
Writing to The Console
If your browser supports debugging, you can use the console.log() method to display JavaScript values in the browser.
Activate debugging in your browser with F12, and select "Console" in the debugger menu.
Example:
<!DOCTYPEhtml> <html> <body> <h1>My First Web Page</h1> <script> a = 5; b = 6; c = a + b; console.log(c); </script> </body> </html>
Did You Know?
Debugging is the process of testing, finding, and reducing bugs (errors) in computer programs. The first known computer bug was a real bug (an insect), stuck in the electronics.

JavaScript Functions and Events

Often, JavaScript code is written to be executed when an event occurs, like when the user clicks a button. JavaScript code inside afunction, can be invoked later, when an event occurs.
Invoke a function = Call upon a function (ask for the code in the function to be executed).
You will learn much more about functions and events in later chapters.
JavaScript in <head> or <body>
You can place any number of scripts in an HTML document. Scripts can be placed in the <body> or in the <head> section of HTML or in both.
Often you will see scripts at the bottom of the <body> section of a web page. This can reduce display time. Sometimes you will see all JavaScript functions in the <head> section. Anyway, separating HTML and JavaScript, by putting all the code in one place, is always a good habit.
JavaScript in <head>
In this example, a JavaScript function is placed in the <head> section of an HTML page. The function is invoked when a button is clicked:
Example:
<!DOCTYPE html> <html> <head> <script> function myFunction() { document.getElementById("demo").innerHTML = "Paragraph changed."; } </script> </head> <body> <h1>My Web Page</h1> <p id="demo">A Paragraph.</p> <button type="button" onclick= "myFunction()">read it</button> </body> </html>
JavaScript in <body>
In this example, a JavaScript function is placed in the <body> section of an HTML page. The function is invoked when a button is clicked:
Example:
<!DOCTYPE html> <html> <body> <h1>My First Web Page</h1> <p id="demo">> Paragraph.</p> <button type="button" onclick="myFunction()">read it</button> <script> function myFunction() { document.getElementById("demo").innerHTML = "Paragraph changed."; } </script> </body> </html>
External JavaScripts
Scripts can also be placed in external files. External scripts are practical when the same code is used in many different web pages. JavaScript files have the file extension .js. To use an external script, put the name of the script file in the source (src) attribute of the <script> tag:
Example:
<!DOCTYPE html> <html> <body> <h1>My Web Page</h1> <p id="demo">A Paragraph.</p> <button type="button" onclick="myFunction()">read it</button> <p><strong>Note:</strong> myFunction is stored in an external file called "myScript.js".</p> <script src="myScript.js"></script> </body> </html>

JavaScript Where To

In HTML, JavaScripts must be inserted between <script> and </script> tags. JavaScripts can be put in the <body> and in the <head> section of an HTML page.The <script> Tag
To insert a JavaScript into an HTML page, use the <script> tag. The <script> and </script> tells where the JavaScript starts and ends. The lines between <script> and </script> contain the JavaScript code
Example:
<script>function myFunction() {document.getElementByI d("demo").innerHTML ="My First JavaScript Function";} </script> /font>
You don't have to understand the code above. Just take it for a fact, that the browser will interpret the code between the <script> and </script> tags as JavaScript.

HTML Strikethrough text

The strikethrough text can be produced using the <del> tag.
Input
<p>This text is <del>cut</del>by a line!</p>
Output
This text is cutby a line !
Striketrough- Applications
This tag has not got very many applications, but we will try to exemplify its use by the following example:
Input
A wedding list
<ol>
<li>An Apple</li>
<li><del>Chess</del></li>
<li><del>Love</del></li>
</ol>
Output
A wedding list
  1. An Apple
  2. Chess
  3. Love

We hope these info has been precious to you!

HTML Subscript

For a subscript i will use the <sub> tag, let's begin:
Input
<p>This is a <sub>subscript text </sub>
Output
This is a subscript text
Subscript Practical applications
The subscript tag, same as the superscript tag can be used at writing the mathematical expressions. Still, the place where we most find it are the chemical formulas.
Input
<p>H<sub>2</sub> 0 : Water
<p>O<sub>2</sub> : Oxygen
<p>CO<sub>2</sub> : Carbon dioxide
<p>H<sub></sub>SO<sub>4</sub> : Sulfuric acid
Output
H20 : Water
O2 : Oxygen
CO2 : Carbon dioxide
H2SO4 : Sulfuric acid
As you can see in the example presented above its use is very practical.

HTML Superscript

To produce a superscript text use the <sup> tag
.
<p>This text is <sup>exponential!</sup</p>
Preview
This text isexponential!
HTML Exponents
We can use the <sup> tag to write mathematical expressions, as you can see:
3<sup>2</sup> = 9
14<sup>x</sup>
Preview
32 = 9 14x
HTML Footer notes
The superscript can be also used for references, explanations, and any other additional information in the foot note.
<p>The woman <sup>1</sup> has lovely eye.</p>
<hr />
<p>1. No explication for this element.</p>
Preview

The woman 1 has lovely eye.

1. No explication for this element.
You can play with this element, which is very rarely used but it is very useful.

HTML pre (Preformatting) tag

When we write a HTML code in notepad. we will use spaces, will press enters so we can orientate easier in searching of the mentioned part. A browser will interpret the code as a single line though, ignoring the spaces and enters mentioned above. For that we have the <pre> tag which makes the browser viewing be the same with the notepad one.
Input
<pre>Your privacy is important to us. Your contact information is used only to respond to your feedback.</pre>
Output

Your privacy is important to us. Your contact information is used only to respond to your feedback.

HTML Code format

The <code> tag allows you to format the text to make it be of computer. This offers a certain size and a certain distance specific to the computer code.
Input
<code>This text was formatted with the tag code</code>
Output
This text was formatted with the tag
This tag is used to write certain scripts such as these in this tutorial.
HTML Code Links
<p>This is an example of a link to >a href=" http://www.google.com"> <code> Google</code> </a> formatted with code tag </p>
Output
This is an example of a link to Google formatted with code tag

HTML Italic Text

This is the same as the bold tag, is used to highlight certain terms or words, sometimes even an entire sentence. It is not indicated to abuse its use though. To create this type of text we can use the followings:
<i>Italic</i> Tag!
<em>Emphasized</em> Tag!
<blockquote>Blockquote</blockquote> Tag!
<address>Address</address> Tag!
Preview
Italic Tag!
Emphasized Tag!

Blockquote
Tag!
Address
Tag!
Usually, the browser will interpret these tags the same.

HTML Bold Text

To get the bold text use the <b> tag.
<b>This text is bold</b>
Preview
This text is bold
Generally, the bold text is used to emphasize certain words or certain terms in within a sentence, letter or a word

HTML Hidden Fields

Hidden fields will not be shown by the browser. Those are necessary when when we have to deal with forms and databases in MySQL or SQL, but it does not limit to that. We will use the hidden fields to send additional information to the database, compared to the information sent by the user.
<input type="hidden" />
This fragment of a code will not show anything because the browser treats it as information that must not be shown.
HTML Other attributes
We will use the attributes name or id to establish a name for our hidden field.
<input type="hidden" id="age" name="age" value="25" />
<input type="hidden" id="DOB" name="DOB" value="01/01/2006" />
<input type="hidden" id="admin" name="admin" value="1" />
We exemplified above three models of hidden fields that could be of use especially if you have a web page where the user will have to login in order to have access to certain information. The 'admin' field is used to verify someone's rank, 1 being administrator, and 0 non administrator.
Hidden fields are used when we have to deal with information that we want to put down in more than one form, not willing for the user to have to insert the information many times.

HTML Drop down lists and selection forms

The drop down lists are one of the most practical types of lists. You probably already came across them all over the internet, but without knowing they had a name so fancy.
Input
<select>
<option>Pakistan
</option> <option>Dubai
</option>
<option>Arab
</option>
</select>

Output

The browser will automatically show the first option. This thing can be changed with the help of the selected attribute though <select>
Input
<select>
<option>Arab
</option>
<optionselected="yes">Dubai</option>
<option>Pakistan</option>
</select>

Output

HTML Selection forms
We will use the size attribute to change a drop down list to a selection form
Input
<selectsize="3">
<option>Arab
</option>
<option>Dubai</option>
<option>Pakistan</option>
</select>

Output

HTML Multiple selections
In the case in which the user wants to choose more than one of the resented, we will make it easier with the help of the multiple attribute.
Input
<selectmultiple="yes"size="3">
<option>Arab
</option>
<option>Dubai</option>
<option>Pakistan</option>
</select>

Output

It is to be understood that this attribute will not work with a drop down list.

HTML Upload form

The upload is a very practical form to allow the users to put photos, films or any other kind of files on the server. To create an upload form we will only have to establish the file value to the <input type=" "> tag.
Input
<input type="file" />
Output

Upload Max file size
To limit the size of some of the files uploaded on the webhosting server we will use a hidden field.
Input
<input type="hidden" name="MAX_FILE_SIZE" value="400" />
<input type="file" />

Output

The value chosen in the example above was 400. That means that files over 400 kb will not be allowed for upload. A value of 100 would mean 100kb, one of 1000 would mean 1000kb= 1MB and so on.

HTML Text areas

Text areas of this kind are used for comments, blogs, memos or any other purpose that requires an expression space.
<textarea>Welcome to University of Hackers!</textarea>
Output

Text areas and size
To change the standard size of a text area use columns & lines, with their HTML usage, cols & rows. Those will have numerical values. The bigger their value will be, the bigger the text area will be.
Input
<textarea cols="50" rows="2">Text area!</textarea>
<textarea cols="40" rows="5">Text area!</textarea>
<textarea cols="20" rows="10">Text area!</textarea>

Output


The wrap attribute
This attribute of the <textarea> tag will establish the way in which the text will react when it will reach the end of the line. Wrap have one of the three values:
Hard: will place an enter at the end of every line and will send the text in the same format it was introduced
Soft: will place an enter at the end of every line, but unlike the Hard one it will send the text in a free format.
Off: This will not format the text in any way, letting the text in a single continuous line.
The Hard/Soft attribute
<textarea cols="20" rows="5"wrap="hard"> Hard will place an enter at the end of every line and will send the text in the same format it was introduced.

Output

The Attribute off
<textarea cols="20" rows="5"wrap="off"> This will not format the text in any way, letting the text in a single continuous line.
</textarea>

Output

The 'readonly' attribute
Input
<textarea cols="20" rows="5" wrap="hard"readonly="yes"> This text cannot be modified. In the case in which the 'no' value would be chosen the opposite result would be obtained.
</textarea>

Output

The disabled attribute
The disabled attribute text will be shown in gray, disabling at the same time the possibility of modifying the text that text area contains.
Input
<textarea cols="20" rows="5" wrap="hard"disabled="yes"> The disabled attribute text will be shown in gray, disabling at the same time the possibility of modifying the text that text area contains.
</textarea>

Output

29/09/2014

HTML The input tag

The input tag does not need an ending tag and can have numerous attributes:
text
password
radio
checkbox
reset
submit
HTML Text fields and passwords
Input
<input type="text" />
<input type="password" />
Output


Write something in the boxes above to note the difference.
HTML Checkboxes
Ideal for offering the user the option of selecting more than one answers
Input
<input type="checkbox" />

Output


HTML Radio
And I didn't mean a music radio, but a little circle which offers the possibility of choosing only one answer for a single question.
Input
<input type="radio" />

Output


HTML Submit buttons
Here, we will have to give a value to the submit attribute, this being the text that will be shown on the generated button.
Input
<input type="submit" value="Submit" />
<input type="submit" value="Next step >>" />

Output


HTML Reset Buttons
Here, same as with the submit button, we will have to give a value, that being the text that will be shown on the generated button. This button is extremely useful in the cases in which the user completes the majority of the forms with wrong information.
Input
<input type="reset" value="Reset" />
<input type="reset" value="Delete All " />

Output


HTML Input fields
Note: It must be specified that those forms and buttons will not fully act without the help of a php or javascript files that will execute the wanted action once one of these buttons is pressed. In the next tutorial we will go more in depth with the shown attributes and you will also show some things that we have not yet mentioned.
Have a nice time

HTML The DIV tag

The div tag is not something more than a support for other tags. Here are some of the div attributes:
id
title
style
height
width
The rest of the attributes are not usually used, their job is taken by the CSS. Here is an example of using the <div> tag:
<div id="menu" align="right">
<a href="#">HOME</a> | <a href="#">CONTACT</a> | <a href="#">ABOUT</a>
</div>
<div id="content" align="left" bgcolor="white"< >h5>Title here </h5>
End here will be the content of the paragraph . End here will be
</div>>

Preview

Title here
End here will be the content of the paragraph . End here will be.

The div tag is much easier to use than the table tag, so for that it is recommended to use it as many times as you need.
HTML The div tag easy to modify
One of the reasons for which it is easy usable is introducing new info with ease and we will exemplify this to you. In this example, we have added some new fields to the page exemplified above.
<div id="menu" align="right">
<a href="#">HOME</a> |
<a href="#">CONTACT</a> |
<a href="#">ABOUT</a> |
<a href="#">SITEMAP</a>
</div>
<div id="content" align="left">
<h5>Title here</h5>

End here will be the content of the paragraph. End here will be the content of the paragraph. End here will be the content of the paragraph.
<h5>Second title here </h5>
End here will be the content of the second paragraph. End here will be the content of the second paragraph. End here will be the content of the second paragraph
</div>
Preview
Title here
End here will be the content of the paragraph. End here will be the content of the paragraph. End here will be the content of the paragraph.
Second title here
End here will be the content of the second paragraph. End here will be the content of the second paragraph. End here will be the content of the second paragraph.

HTML The Body tag

As we have mentioned earlier in another tutorial, the <body> tag is the one that contains every thing that will be shown in a web page: tables, frames, forms, paragraphs, photos and anything else. All this are entered between <body> and </body> tag.
HTML Attributes of the body tag
leftmargin establishes
An edge in the left side of the page (a blank space)
topmargin establishes
An edge in the top side of the page (a blank space).

An example would be:

<body topmargin="50">
This text is located at a distance of 50 pixelsof the top ofthe page
</body>
<body leftmargin="50">
This text is located at a distance of 50 pixelsto the leftof the page
</body>

You can copy this code into a notepad file, saving it as .html to view it best.
HTML Text color established by the body tag
<body text="red">
or <body text="rgb(255,0,0)">
This part of a code will establish the base font color as red, in the case another color is not specified within the paragraph tag
HTML Link color established by the body tag
Same as with the text you can set the viewed or not viewed links color with the help of the body tag.
<body link="white" vlink="black">
or <body link="rgb(255,255,255)" vlink="rgb(0,0,0)">
This method is used very rarely though, using the CSS (Cascading Style Sheets) being much easier and more practical.

Inserting HTML codes for video

A video file can be inserted in a html page in two ways. The first way would be using the <embed/> tag. This tag does not need an ending/finishing tag. It works, mostly, the same as a tag for an photo works
<embed src="example.mpeg" autostart="false" HEIGHT=60 WIDTH=144/>
Also, you can insert a video file using a link
<a href="example.mpeg">Movie Name </a>
Movie Name
Supported extensions for the embed tag
These are:
.swf: made by Macromedia Flash
.wmv: Microsoft Windows Media Video
.mov: Quick Time Movie, belongs to Apple
.mpeg: Created by Moving Pictures Expert Group.
The most used are .mpeg and .swf because of the compact format.
Attributes of the embed tag
auto establishes
Whether the file will run automatically after the page is loaded. Can have the true or false value
hidden establishes
Whether the buttons are hidden or not. Can have the true or false value. volume- can have any value from 0 to 100
loop establishes
Whether the file will be replayed after it is finished. Can have the true or false value. playcount
This establishes how many times the file will be replayed. For example playcount="2" means it will be replayed two times and after it will stop.
Inserting a You Tube video
You can do that very easy, because You Tube has on every page the needed HTML code.
<! -- Here will start the You Tube code -->
<object width="425" height="344"><param name="movie" value=" http://www.youtube.com/ v/UAq8=en&fs=1"> </param><param name="allowFullScreen" value="true"> >/param> <embed src=" http://www.youtube.com/ v/UAq8q=en&fs=1" type="application/x-shockwave-flash" allowfullscreen="true" width="425" height="344"></embed></object>
<! -- Here will end the You Tube code -->
Truth is that everything you see is quite chaotic, but the good part is that you only have to copy it from the You Tube, and paste it, and you will have your video.

Inserting codes for music in HTML

Some time ago it was quite complicated to insert music or sounds on a web page. Now, that problem is solved, adding sounds being quite simple.
<EMBED SRC="sound.mid" hidden="false" autostart="false" loop="false" volume="60" HEIGHT=60 WIDTH=144/>
It is recommended that both height and width to be directly proportional to avoid problems. To hide the player the value of the hidden attribute will be replaced by true. This thing is done if you are absolutely that the user does not wish to stop the sound.
Controlling and manipulating the player
Let's have a look on the above example:
<EMBED SRC="sound.mid" hidden="false" autostart="false" loop="false" volume="60" HEIGHT=60 WIDTH=144/>
autostart - establishes whether the sound will start immediately after the web page is loaded. Can have the true or false value. volume can have any value from 1 to 100. You can play a little with these attributes to better memorize and understand them, and also be aware that a higher volume may be annoying for the user.
Warning: Listening music at high volume may damage your hearing quality.

Inserting Javascript and Vbscript in HTML

Javascript and Vbscript are often used in a HTML page code to give more liveliness to the page, or just for one of the many applications of these scripts. Using these scripts you can create dynamic animations of some photos, an animated menu with amazing effects and so on. Also, one of the most important applications is that of validating a form before sending it. This will make the user spend considerably less time in the case the user has wrongly completed the fields, and a reload of the page being needed. In this part we will only talk about the method of inserting the script into HTML
Note: Most of the time it is much easier to just download from someone else than to write these scripts. In fact, that is just possible only if the author has given his/her agreement.
Inserting Javascript in HTML
Inserting a javascript code is done very easily using the script tag. Here is an example:
<script type="text/javascript">
<!--Here will be the the javascript code-->
</script>

For the javascript codes the 'text/javascript' value will be given to the type attribute.
Inserting Vbscript in HTML
Inserting a vbscript code is done in the same way as the javascript code is done, only that you replace the 'text/javascript' with 'text/vbscript' Here is the example:
<script type="text/vbscript">
<!--script
Here will be the the javascript code-->
</script>

It is always recommended to insert a comment along with the javascript and vbscript codes. That will warn the browsers that do not support that kind of script, or browsers that have javascript and vbscript disabled.

Meta tags

The meta tag is used to generate additional info to the search engine. These information will not be unless that user will select view 'Source' from the 'View' menu where he will have access to the HTML part of the page.
Meta keywords
In the meta tag you can add words or keywords. Here will be put the most important words that can target to your web site. It is recommended that you do not abuse these tags, because using keywords that have no link to the web site's content, neither the search engines nor the users will gain any profit. Here is a moderate example of using the meta tag
<head>
<meta name="keywords" content="Tutorials, hacking, HTML, web, resources, webmaster" />
</head>

This example is based on this page's profile. As you can see, the name specifies what kind of meta tag will be used. Also, the comma that is used to separate the words from each other has to be specified, something trivial but something that many forget once they have to do it
Meta Description
This tag helps you to describe your web site. A maximum of two sentences will be used to complete the content of this tag.
<head>
<meta name="description" content="The World's Best Site to Solve your Computer Problems, Learn Complete Computer Softwares & Latest Computer Tips & Tricks"/>
</head>

As you can see, the name specifies what kind of meta tag will be used. Also, the comma that is used to separate the words from each other has to be specified, something trivial but something that many forget once they have to do it.
Meta Revised
Revised tag in meta It is used to specify the latest bringing up to date of the web site.
<head>
<meta name="revised" content="1/08/2014" />
</head>

Meta Refresh
Refreshing is done with the help of the http-equiv="refresh" attribute The purpose of this tag is to reload the page and to display new info in the case of a bringing up to date. A very useful application for a forum, for example.
<head>
<meta http-equiv="refresh" content="10; url=http://deadlyuniversityspy.blogspot.in" />
</head>

Meta Redirect
Redirect is easily done by changing the address of the web page with the one you want it redirected to. The application is welcomed when you buy a new domain and the redirection of the users to the new page is wanted.
<head>
<meta http-equiv="refresh" content="5; url=http://deadlyuniversityspy.blogspot.in" />
</head>

HTML Comments

Comments are often used in the HTML codes. That is why it is important not to be pointed out to the browser to avoid showing them. There are many reasons we can add a comment within a html script. A note or a reminder, a specification, a blank title or a clarification.
Javascript comments
An unfinished element The comment will be placed between the "<!--" and "-->" tags. This way, we will be able to leave a note to remember on a later time what the code was for, or if something is still needed to be introduced in there.
<!--The beginning of the code that shows a photo-->
<img src="hoto.jpg" alt="blank" width="52" height="52" /></a>
<!--The end of the code that shows a photo-->
Preview
blank
This is just an example of the things you can comment in a script. In time, you will learn that these comments are very useful for a better understanding of the code at a later date. Any text, characters, symbols or anything else placed between the opening tag "<!--" and the ending tag "-->"
HTML Unfinished script
Comments are very useful when you work at a script but you leave it unfinished. Putting it between the two tags "<!-- code --> will be interpreted as a comment by the browser and therefore will not be shown. When you have finished the code and you will need to show it all you will need to do is to erase the two tags and the browser will show the wanted script.
Input
<input type="text" size="12" />
Output

HTML Bgcolor

The Bgcolor attribute is used to establish the the background color of a HTML paragraph, table or any other content
<"numetag" bgcolor="Value"> This is a model of how the bgcolor attribute will be used within a tag.
Input
<body bgcolor="Silver"> <p>This is the silver bgcolor.</p> </body>
Output

This is the silver bgcolor

Adding bgcolor to the tables
Input
<table> <tr bgcolor="#FFFF00"><td>This Row is Yellow!>/td<</tr> <tr bgcolor="#AAAAAA"><td>This Row is Gray!</td></tr> <tr bgcolor="#FFFF00"><td>This Row is Yellow!</td></tr> <tr bgcolor="#AAAAAA"><td>This Row is Gray!</td></tr> <tr bgcolor="#FFFF00"><td<This Row is Yellow!</td></tr> <tr bgcolor="#AAAAAA"><td>This Row is Gray!</td></tr> </table>
Output
This Row is Yellow!
This Row is Gray!
This Row is Yellow!
This Row is Gray!
This Row is Yellow!
This Row is Gray!

Font and background
Input
<font color="blue"><table bgcolor="#000000"> <tr><td bgcolor="#009900"> <font color="#FFFF00" align="right">Green Bay</font<>/td> <td><font color="#FFFFFF">30</font></td></tr> >tr><td bgcolor="#0000FF"> <font color="#DDDDDD" align="right">New England</font></td> <td><font color="#FFFFFF">11</font></td></tr> </table>
Output
Green Bay 30
New England 11

Paragraph on a gray background
Input
<table bgcolor="#777777"> <tr><td> <p><font face="Monotype Corsiva, Verdana" size="4" color="#00FF00">This paragraph tag has</font></p> </td></tr> </table>
Output
Look at this paragraph

HTML: Tables

Tables can be difficult at first, but with a little patience and practice you will se that things are not always how they seem to be. The <table> tag is used to open a table.
Within this tag we will find two others typical tags, <tr> the table lines & <td> the table column
Input
<table border="1"> <tr><td>Row 1 Cell 1</td><td>Row 1 Cell 2</td></tr> <tr><td>Row 2 Cell 1</td><td>Row 2 Cell 2>/td></tr> </table>
Output
Row 1 Cell 1Row 1 Cell 2
Row 2 Cell 1Row 2 Cell 2

The content will be placed within the table's rows. A row represents what is between <td> and </td> The border attribute establishes the length of the table's edge.
HTML: Asymmetrical tables
To form asymmetrical tables we will use rowspan to cross more than one line and colspan to cross more than one columns.
Also, if we want that the first line to serve as titles line for all the columns we will use the <th> tag. These will be written with bold letters as we will see in the following example:
Input
<table border="1"> <tr> <th>Column 1</th> <th>Column 2</th> <th>Column 3</th> </tr> <tr<>td rowspan="2"<Row 1 Cell 1</td> <td>Row 1 Cell 2</td><td>Row 1 Cell 3</td></tr> <tr><td>Row 2 Cell </td><td>Row 2 Cell 3</td></tr> <tr><td colspan="3">Row 3 Cell 1</td></tr> </table>
Output
Column 1 Column 2 Column 3
Row 1 Cell 1 Row 1 Cell 2Row 1 Cell 3
Row 2 Cell 2Row 2 Cell 3
Row 3 Cell 1

HTML: Image links and Thumbnails

With images, you can give a bit of life to a web page. Transforming an image in a link is not however hard. You just need to introduce the source of the image in the interior of the tag link.
Input
<a href="http://forums.rpgmakerweb.com/uploads/profile/photo-8761.png?_r=1356197593"><img src="/img/image.jpg"></a>
Output

Thumbnails
The thumbnails are versions in miniature of some images which in reality are bigger and with a better quality. To make a thumbnail, save the image in a poor quality and in small dimensions. Then make this image a link which will lead at the initial image of big dimension.
Input
<a href="http://forums.rpgmakerweb.com/uploads/profile/photo-8761.png?_r=1356197593"><img src="/img/tumb.jpg"> >/a>
Output

HTML: E-mail links

To make an e-mail link is very simple. If you want someone to write you an email the best thing to do it would be to put at its disposition a link with your email and a pre-established subject. Input
<a href="mailto:someone@ exemple.com?subject=Questions">Email Me Here</a>
Output
Email Me Here
In case you don't want to add subject to the email, you can do it with the help of this code:
<a href="mailto:someone@ exemple.com">Email Me Here</a>
Output
Email Me Here

28/09/2014

HTML: Text and Image Links

The href attribute names the connection to an other web page. Actually is the place where it will be sent the user who clicks on the link.
Input
>a href="https://m.facebook.com">Click Here</a>
Output
Click Here
Image Links
<img src="Pic URL" alt="DESCRIPTION" />

HTML: Font

The <font> tag is used for modifying the type of a text, the size and the color. Use "size", "color" "face" attributes to personalize your text and the <basefont> tag to set the color, size and the style of a whole text. Mostly the "font" & "basefont" tags are not used much because is used CSS to establish a text attributes.
The Font Size Set the size of your font. There are accepted values between 1 the smallest and 7 the biggest. The standard value of a text is 3.
<p> <font size="5"> This is font size 5</font> </p>

Preview

This is font size 5
The font color

Set the color of the text <font color="#990000">This text is hexcolor #990000</font> </br> <font color="red">This text is red </font> This text is hexcolor #990000
This text is red

HTML Line break

A line break is different from the other tags. The place we put it in the source code of the document, will end the line and it will go down with a line , letting a space which is smaller than the one from the paragraph. As you can see, in the next example.
<p>John Elwin</br>
Jammu & Kashmir</br> India Occupied</br> </p>

Preview
John Elwin
Jammu & Kashmir
India Occupied

HTML: Titles/Headings

In HTML, a title is exactly what you looks at the top of the content.
When you put a text in a tag <h1> the text will be bolded, and the dimension of the letter will be the same with the number of the heading. The titles can have dimensions form 1 to 6, where 1 is the smallest dimension and 6 the biggest dimension
<h1>Headings</h1>
<h2>are</h2>
<h3>great</h3>
<h4>for</h4>
<h5>titles</h5>
<h6>and subtitles</h6>

22/09/2014

How To Disable Right Click On Your Website Or Blog?

Text Select Disable

Code


Preview

PIC DESCRIPTION
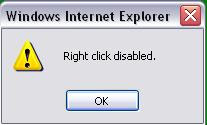
Right Click Disable Message
Code


Preview

PIC DESCRIPTION Left click Right Click Message code
Code


Preview

PIC DESCRIPTION
Right Click Silent Disable code
Code

Preview

PIC DESCRIPTION Image Right Click Message
Code

Preview

PIC DESCRIPTION

21/09/2014

How to code keylogger in C programming Language

C program of Keylogger or is a computer program which captures all the key strokes pressed by user in real time. It captures all the keys and write them to some file say log.txt and stores it on computer hard disk. Now sending these logs to emails or FTP address depends upon the type of Keylogger that is keylogger is remote keylogger or physical keylogger.
Physical Keylogger are useful when you have physical access to that system and can retrieve logs personally. While Remote Keyloggers can be used from anywhere in the world, the only requirement is that victim must have internet connection.
Today i will write a C program of Physical keylogger or Keystroke logger which requires physical access of the system.
Let's extending our logic in further programs to make it remote keylogger which sends logs to FTP’s and Emails directly. So first of all lets see how simple Keylogger program works

Algorithm for writing a Simple Keylogger:

1. Create an Empty log file for storing keylogs.

2. Intercept keys pressed by user using GetAsyncKeyState() function.

3.  Store these intercepted values in file.

4.  Hide the Running Window Dialog to make it undetectable.

5.  Use while loop to make it running in all conditions.

6.  Add Sleep() function to reduce the CPU usage to 0%.

Now let us see the C program of Keylogger or which intercepts all the keys pressed by the USER and store these pressed keys in log file.
For complete guide of C, C++ and other programes, visite my Official Website by uploading your file on the server

Seven Most Common Password Cracking Methods And Their Countermeasures

There are number of methods out their used by HACKERS to hack your account or get your personal information.
Today in this tutorial i will share with you 7 Most commonly used method to crack password and their countermeasures. You must check out all these article in order to prevent your online accounts from hacking.
some text
Brute Force Attack

some text
Social Engineering

some text
RAT (Remote Access Trojan)

some text
Keyloggers

some text
Phishing Method

some text
Rainbow Table

some text
Password Guessing

Brute Force Attack

Any password can be cracked using Brute force attack. Brute force attack try every possible combinations of numbers letters and special characters until the right password is match. Brute force attack. can take very long time depending upon the complexity of the password.
The cracking time is determined by the speed of computer and complexity of the password.
Countermeasure:

Use long and complex passwords.

Try to use combination of upper and lowercase letters along with numbers.

Brute-force attack will take hundreds or even thousands of years to crack such complex and long passwords.

Example: passwords like ihateu imissu or iloveu can be cracked easily whereas computer will take years to crack passwords like aN34lL00 gA%l#a_X?§

Phishing and it's defenses

Phishing is one of the type of hacking It is a method of acquiring sensitive information such as username password, bank information etc. Phishing page could be saif as an duplicate page of real one. Its look exactly similar as the real page. But when user enter sensitive information on such Phishing page his information is send to the E-mail address provided in the phishing page or you can say the one who created that phishing page.
Phishing page is mostly send via mail. Target of phishing are mostly social networking sites like facebook, tweeter etc. Also Bank websites to acquire credit card details, website like yahoo, gmail are also targeted by Phishing sites
Example of Phishing scams:

→Email asking you to login to your locked account to unlock it.

→Email carrying a Link to sites like Facebook,yahoo etc and asking you to login.

→Emails containing some Information of your Interest and asking you to login to Your Account.

How to be safe from phishing?
→Never login to any of your account through link provided in the Email.

→Go to real website don't click on any link posted anywhere. such as link posted on your facebook wall by friend or link provided in comments or link to ceratin website on any blog.

→Check the URL of website before entering any sensitive information. Because the URL of phishing page is not same as the URL of real one.
Real gmail page looks like https://gmail.com/ while phishing looks different something like http://gmeil.com/

Ensure the S between http and https in the address bar and do not look on the area or the title of website, look in the URL instead.

What Is Keylogger And How To Be Safe From Keyloggers?

In this tutorial i am going to talk about the most use piece of software besides from RAT by hackers to observe your activities on your computer and that is keyloggers
A keylogger is a software or hardware device which monitors each and every key typed by you on your keyboard. I am going to talk about different types of keylogger and how to be safe from keyloggers. So lets learn something about keyloggers
What is keylogger?
You might have heard about keyloggers but really dont know what they are reading this article will clear your mind.
A keylogger also know as keystroke logger is software or hardware device which monitors each and every key typed by you on your keyboard. You can not identify the presence of keylogger on your computer since it runs in background and also it is not listed in task manager or control panel. It can be used by parents to keep eye on their childrens or company owner to spy on their employes.
How it can harm you?
In this section i will talk about how keylogger can harm you in different ways for example It can be used by your enemy or friend to get sensitive information such as your username password Bank credit card details, or any other activities you do on your computer.
Example: You login in to your Facebook account from a computer in which keylogger is install then your username and passwordwill be captured.
Types of keyloggers
There are two types of keylogger hardware keylogger and software keylogger.
Software keylogger is install in your computer where as a Hardware keylogger is attached to your keyboard.
How to Protect yourself from keyloggers?
In order to be safe keep following points in your mind.

Never use your online banking from cyber cafe.

If you want to use then you can try this method:
Open notepad and type anything Then copy and paste each word that comes in your username and password
You can even use above method to protect your FB profile Yahoo or Gmail

When you enter cyber cafe make sure that no hardware device is attached to keyboard wire.

What is RAT or Remote Access Trojan?

RAT stands for Remote Access Trojanor or Remote Administration Tool. It is one of the most dangerous Virus out their over the internet.
Hacker can use RAT to get complete control to your computer He can do basically anything with your computer. Using RAT Hacker can install keylogger and other malicious viruses remotely to your computer infect files on your system and more.
In this post i will tell you about what Hacker can do with your computer using RAT and tell you about some commonly use RAT by hackers.
What is RAT?
As i have told you in my introduction paragraph RAT is Remote Access trojan It is a peace of software or program which hacker uses to get complete control of your computer.
It can be send to you in form of Images Videos or any other files. Their are some RAT that even your antivirus software can not detect.
So always be sure about what you are downloading from the internet and never save or download files that anonymous user send you over the mail or in chat room.
What You Can do With RAT?
Once a RAT is installed on any computer hacker can do almost anything with that computer. Some malicious task that you can do with RAT are listed below:
Infecting Files
Installing Keyloggers
Controlling Computer
Remotely start WebCam Sounds Movies etc
Using your PC to attack Website DDOS
View Screen
Harmless RAT or Good RAT
As you have seen how harmfull RAT are for your computer, but their are some good RAT which some of you might be using daily. You might have heard of TeamViewer it is a software which you use to control some one's computer with his permission for file transfer, sharing your screen and more.
Some Commonly Used:
*RAT
*ProRAT
*CyberGate RAT
*DarkComet RAT

19/09/2014

Top computer commonds

•Append
The append command can be used by programs to open files in another directory as if they were located in the current directory. The append command is not available in 64-bit versions of Windows 8
•Arp
The arp command is used to display or change entries in the ARP cache.
•Assoc
The assoc command is used to display or change the file type associated with a particular file extension.
•Attrib
The attrib command is used to change the attributes of a single file or a directory.
•Bcdboot
The bcdboot command is used to copy boot files to the system partition and to create a new system BCD store.
•Bcdedit
The bcdedit command is used to view or make changes to Boot Configuration Data.
•Bdehdcfg
The bdehdcfg command is used to prepare a hard drive for BitLocker Drive Encryption. •Bitsadmin
The bitsadmin command is used to create, manage, and monitor download and upload jobs. While the bitsadmin command is available in Windows 8, you should know that it is being phased out.
•Bootcfg
The bootcfg command is used to build, modify, or view the contents of the boot.ini file, a hidden file that is used to identify in what folder, on which partition, and on which hard drive Windows is located.
•Bootsect
The bootsect command is used to configure the master boot code to one compatible with Windows 8 BOOTMGR
•Break
The break command sets or clears extended CTRL+C checking on DOS systems. The break command is available in Windows 8 to provide compatibility with MS-DOS files but it has no effect in Windows 8 itself.
•Cacls
The cacls command is used to display or change access control lists of files. Even though the cacls command is available in Windows 8, it's being phased out.
•Call
The call command is used to run a script or batch program from within another script or batch program.
•Change
The change command changes various terminal server settings like Install Modes, COM port Mappings & Logons.
•Checknetisolation
The checknetisolation command is used to test apps that require network capabilities.
•Chglogon
The chglogon command enables, disables, or drains terminal server session logins.
•Chkdsk
The chkdsk command, often referred to as check disk, is used to identify and correct certain hard drive ERRORS

10/09/2014

Mobile Phone Quick Codes

Codes for Nokia phones
Codes With Their Functions:
*#0000# *#999# Display software version
*#7780# Reset all settings, then enter the special code 12345 by default
*#7370# or *#62209526# Reset all settings and erase all data, then enter the special code 12345 by default
*#92702689# Service Menu
*#746025625# Shows if the sim clock stop allowed mode is supported and activated. This is an energy saving feature
*#67705646# Erase provider logo
*#7370925538# Erase suitcase including Password
*#2820# Display Bluetooth device address
*#62209526# Display MAC device address only for devices with WLAN WiFi
##634# Start diagnostic
Codes for Samsung phones
*#1111# Display software version
*#1234# Display Firmware version
*#2222#D Display hardware version
*2767*3855# Reset/Delete all data and reset all settings
*#0*# Test service mode e.g Galaxy S3 mini
*#*#4636'*'* Test service mode e.g Galaxy S2

09/09/2014

Learn To Hide Files Behind The Images

There are some important files or document you want to hide from others on your computer and you might be creating folder inside folder to hide such files but in this tutorial i will change this by teaching you a interesting trick to hide files behind images. Hiding a file behind a image means that if any one opens that image he will see the image, but to see the hidden file we need to open that image in a specific way. So lets get started.
How To Hide File Behind Image?
1. Select an image to be used for hiding file behind the image.
2. Now select a file to hide behind the image and make it in
in.RAR
format with the help of the WinRAR
3. Paste both the files on desktop. You may do this anywhere instead of desktop if you have some basic understanding of Command Line
4. Now open cmd by going to
Start>Accessories>Command Prompt
and type following commands in it.
5. CD stands for change directory by typing above command you can change your directory to desktop. After that type command given below.
Copy /b imagename.jpg + filename.rar finalimage.jpg
Replace image name jpg with the name of image you want your file to be hidden behind. Don't forget to add image format Eg: jpg, png, gif
Now replace file name with your desired file name and it must be in RAR format.
Finally Replace final image jpg with whatever name you want your final image with hidden files should be.
This is the image where your file will be hidden
6. Now when you will try to open this newly created image it will open as normal image, but to open you hidden file you need to follow the steps given below.
How To Access Hidden File?
To access your hidden file you need to open the newly created image in WinRAR Just follow simple steps given below:
1. Open WinRAR
2. Now locate your image and open it or simply drag your image in WinRAR
3. Extract the file and done.

08/09/2014

View or Hack Unprotected Live Cameras Using Google

In this tutorial i will teach you to hack or view Unprotected Cam using a simple Google trick. Using this trick you can see live view of streets in China or Americas Inner view of some office and lot more. Lets dive into it.
1. Go to Google and search for inurl:view/view.shtml
2. Now open any of the link from the search result and enjoy
Below is the list of google dork you can use to see more cams
inurl:/view.shtml
inurl:view/view.shtml^
inurl:ViewerFrame?Mode= inurl:ViewerFrame?Mode=Refresh
inurl:axis-cgi/jpg inurl:axis-cgi/mjpg (motion-JPEG)
inurl:view/indexFrame.shtml
inurl:view/index.shtml
inurl:view/view.shtml
inurl:cgistart
intitle:”live view” intitle:axis liveapplet
inurl:home/ intitle:liveapplet intitle:”i-Catcher Console - Web Monitor” intitle:axis intitle:”video server”
intitle:”EvoCam
inurl:”webcam.html
intitle:Live NetSnap Cam-Server feed
inurl:indexFrame.shtml Axis
intitle:Live View / - AXIS 206M
intitle:Toshiba Network Camera user login